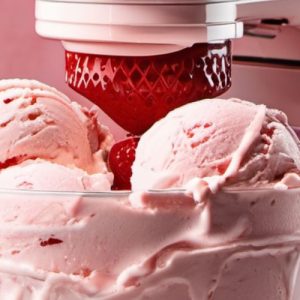
KitchenAid Strawberry Ice Cream, crafted with the aid of a KitchenAid stand mixer attachment, epitomizes the art of homemade frozen desserts. This delightful treat captures the essence of summer with its vibrant flavors and creamy texture. By harnessing the power of the KitchenAid stand mixer, this recipe transforms fresh strawberries into a luscious ice cream that rivals any store-bought counterpart.
The convenience of the KitchenAid attachment makes the process seamless, allowing ice cream enthusiasts to indulge in a scoop of homemade goodness without the need for specialized equipment. With each creamy spoonful infused with the natural sweetness of strawberries, KitchenAid Strawberry Ice Cream stands as a testament to the joys of creating frozen delights in the comfort of one’s kitchen.

KitchenAid Strawberry Ice Cream Recipe
Ingredients
- 1 cup fresh strawberries, washed and hulled
- 3/4 cup granulated sugar
- 2 cups heavy cream
- 1 cup whole milk
- 1 teaspoon vanilla extract
- A pinch of salt
Instructions
- Prepare the Strawberries:Slice the strawberries into small pieces.In a bowl, toss the sliced strawberries with 1/4 cup of sugar.Let the strawberries sit for about 30 minutes to release their juices and macerate.
- Create the Strawberry Puree:Transfer the macerated strawberries into a blender or food processor.Blend until smooth to create a strawberry puree. Set aside.
- Make the Ice Cream Base:In your KitchenAid stand mixer bowl, combine the heavy cream, whole milk, remaining 1/2 cup of sugar, vanilla extract, and a pinch of salt.Attach the paddle attachment to the mixer.
- Blend in the Strawberry Puree:With the mixer running on low speed, slowly pour the strawberry puree into the ice cream base mixture.Continue mixing until the puree is fully incorporated and the mixture is smooth and creamy.
- Chill the Mixture:Cover the mixing bowl with plastic wrap or a lid.Refrigerate the ice cream mixture for at least 2 hours, or until thoroughly chilled.
- Use the Ice Cream Maker Attachment:Attach the KitchenAid ice cream maker attachment to your stand mixer according to the manufacturer's instructions.Turn on the mixer to the "stir" speed.
- Churn the Ice Cream:Let the ice cream churn for about 20-25 minutes, or until it reaches a soft-serve consistency and thickens.
- Freeze the Ice Cream:Transfer the churned ice cream into a freezer-safe container.Cover the container with a lid or plastic wrap, ensuring it's airtight.Freeze the ice cream for at least 4-6 hours, or until it firms up to your desired texture.
- Serve and Enjoy:When ready to serve, scoop the creamy strawberry ice cream into bowls or cones.Garnish with fresh strawberry slices or a mint leaf for a pop of color and freshness.Indulge in the creamy, homemade goodness of KitchenAid fresh strawberry ice cream!
Notes
Ingredients
Here’s a detailed list of ingredients needed for KitchenAid Strawberry Ice Cream:
- Fresh Strawberries: Use ripe and fresh strawberries for the best flavor. Wash, hull, and chop the strawberries before using them in the recipe.
- Granulated Sugar: Adds sweetness to the ice cream and helps enhance the flavor of the strawberries. Adjust the amount of sugar based on your preference and the sweetness of the berries.
- Heavy Cream: Provides richness and creaminess to the ice cream. Ensure that the heavy cream is chilled before using it in the recipe.
- Whole Milk: Adds creaminess to the ice cream base. Chilled whole milk is preferred for a smoother texture.
- Vanilla Extract: Enhances the overall flavor profile of the ice cream with a hint of vanilla. Use pure vanilla extract for the best taste.
- Optional Ingredients for Variations:
- Lemon Juice or Zest: Adds a hint of citrus freshness to the ice cream.
- Cream Cheese: For a creamier texture and cheesecake flavor, you can add softened cream cheese to the mixture.
- Graham Crackers: Crushed graham crackers can be folded into the ice cream for a delicious cheesecake crust-like texture.
- Chocolate Chips: For chocolate-covered strawberry ice cream, add chocolate chips to the mixture.
These ingredients come together to create a delicious and creamy KitchenAid Strawberry Ice Cream. Adjust the quantities and optional ingredients based on your taste preferences and desired flavor profile. Enjoy experimenting with different variations to customize your homemade ice cream experience!

Instructions for KitchenAid Ice Cream Maker Attachment
Here are the step-by-step instructions for using the KitchenAid Ice Cream Maker Attachment to make delicious homemade ice cream:
- Prepare the Ice Cream Mixture:
- Gather all the ingredients needed for the ice cream recipe, including the chilled mixing bowl and paddle attachment of the KitchenAid stand mixer.
- Follow the specific recipe instructions for preparing the ice cream base. This typically involves mixing together ingredients like heavy cream, milk, sugar, flavorings (such as vanilla extract), and any additional mix-ins (such as fruit puree or chocolate chips) in a separate bowl until well combined.
- Chill the Mixing Bowl and Attachment:
- Place the mixing bowl and paddle attachment of the KitchenAid stand mixer in the freezer for at least 12-24 hours before making the ice cream. Ensure that both components are thoroughly chilled to help the ice cream freeze properly.
- Assemble the KitchenAid Stand Mixer:
- Once the mixing bowl and attachment are properly chilled, remove them from the freezer.
- Attach the chilled mixing bowl to the KitchenAid stand mixer base, ensuring it locks into place securely.
- Attach the chilled paddle attachment to the stand mixer.
- Start the Mixer on Low Speed:
- Turn on the KitchenAid stand mixer and start it on low speed to prevent splattering.
- Slowly pour the chilled ice cream mixture into the mixing bowl while the paddle attachment is in motion. This helps evenly distribute the mixture and prevents lumps.
- Increase to Medium-High Speed:
- Gradually increase the speed of the KitchenAid stand mixer to medium-high or the speed recommended in your ice cream recipe.
- Let the mixer run for about 15-20 minutes or until the ice cream mixture thickens and reaches a soft-serve consistency. The exact time may vary depending on the recipe and ingredients used.
- Add Mix-Ins (if desired):
- If your ice cream recipe includes mix-ins such as chopped nuts, chocolate chips, or fruit pieces, add them to the ice cream mixture during the last few minutes of mixing. Use the KitchenAid stand mixer on low speed to gently incorporate the mix-ins.
- Transfer and Freeze the Ice Cream:
- Once the ice cream reaches the desired consistency, stop the KitchenAid stand mixer.
- Transfer the churned ice cream from the mixing bowl to a freezer-safe container with a tight-fitting lid.
- Cover the container and place it in the freezer to allow the ice cream to firm up further. Freeze for at least 4-6 hours or until it reaches a scoopable consistency.
- Serve and Enjoy:
- When ready to serve, remove the ice cream from the freezer and let it sit at room temperature for a few minutes to soften slightly.
- Scoop the ice cream into bowls or cones, garnish with toppings if desired, and enjoy your homemade KitchenAid ice cream!
These instructions are general guidelines for using the KitchenAid Ice Cream Maker Attachment. Always refer to your specific ice cream recipe for detailed measurements, mixing times, and any additional steps or variations. Happy ice cream making!
Tips and Tricks
There are some helpful tips and tricks for success when using the KitchenAid Ice Cream Maker Attachment:
- Proper Assembly:
- Ensure that the mixing bowl and paddle attachment are thoroughly chilled in the freezer for at least 12-24 hours before use. This helps in achieving a faster and more efficient freezing process.
- Double-check that the mixing bowl is securely attached to the KitchenAid stand mixer base to prevent any accidents during operation.
- Chilled Ingredients:
- Use chilled ingredients, especially the cream and milk, as colder ingredients freeze faster and result in smoother ice cream. Chill the ice cream mixture in the refrigerator before pouring it into the KitchenAid Ice Cream Maker Attachment.
- Pre-Chill the Ice Cream Mixture:
- For optimal results, pre-chill the ice cream mixture in the refrigerator for about 2-4 hours before churning it in the KitchenAid attachment. This helps the mixture freeze faster and prevents excess air incorporation.
- Mixing Techniques:
- Start the KitchenAid stand mixer on a low speed setting when adding the ice cream mixture to the chilled mixing bowl. Gradually increase the speed to medium-high as the mixture thickens.
- Avoid overmixing the ice cream mixture, as it can lead to excess air incorporation and a less creamy texture. Stop mixing once the ice cream reaches a soft-serve consistency.
- Add Mix-Ins Carefully:
- If your ice cream recipe includes mix-ins like nuts, chocolate chips, or fruit pieces, add them to the ice cream mixture during the last few minutes of churning. Use the KitchenAid stand mixer on low speed to gently incorporate the mix-ins without overmixing.
- Storage Tips:
- Transfer the churned ice cream from the mixing bowl to a freezer-safe container with a tight-fitting lid. Press a piece of parchment paper or plastic wrap directly onto the surface of the ice cream before sealing the container. This helps prevent ice crystals from forming on the surface.
- Store leftover ice cream in the freezer for up to 2 weeks. Allow it to soften slightly at room temperature for a few minutes before scooping and serving.
- Clean-Up and Maintenance:
- After each use, clean the KitchenAid Ice Cream Maker Attachment components according to the manufacturer’s instructions. Proper cleaning and maintenance ensure longevity and optimal performance of the attachment.
By following these tips and tricks, you can achieve delicious and creamy homemade ice cream using the KitchenAid Ice Cream Maker Attachment with ease. Adjustments can be made based on your specific ice cream recipe and preferences for texture and flavor.
FAQ
Can I use frozen strawberries to make KitchenAid Strawberry Ice Cream?
Yes, you can definitely use frozen strawberries to make KitchenAid Strawberry Ice Cream. In fact, frozen strawberries are often preferred because they are typically picked and frozen at their peak ripeness, which locks in their flavor and nutrients. When using frozen strawberries, make sure to thaw them before blending to achieve a smooth consistency in your ice cream mixture. Thawing can be done by leaving the strawberries in the refrigerator overnight or at room temperature for a few hours until they are soft enough to blend easily. Once thawed, you can proceed with the recipe as usual and enjoy delicious homemade strawberry ice cream!
Can I make KitchenAid Strawberry Ice Cream without an ice cream maker?
Yes, you can make KitchenAid Strawberry Ice Cream without an ice cream maker using a few alternative methods:
- Freeze-and-Stir Method:
- Pour the prepared ice cream mixture into a shallow dish.
- Place the dish in the freezer for about 45 minutes to an hour until the edges start to freeze.
- Using a fork or spatula, stir the partially frozen edges into the center.
- Continue this process every 30 minutes until the mixture reaches a smooth and creamy consistency, usually about 2-3 hours in total.
- Ziplock Bag Method:
- Pour the ice cream mixture into a quart-sized ziplock bag, ensuring it’s sealed tightly.
- Fill a gallon-sized ziplock bag halfway with ice cubes and add about 1/4 cup of rock salt (or coarse salt) to the ice.
- Place the sealed quart-sized bag with the ice cream mixture into the larger bag of ice and seal the larger bag.
- Shake and massage the bags for about 10-15 minutes or until the mixture inside the smaller bag thickens into ice cream.
- Hand Churning:
- Pour the ice cream mixture into a large bowl.
- Place the bowl in the freezer for about 30 minutes to chill slightly.
- Using a hand mixer or whisk, vigorously beat the chilled mixture every 30 minutes until it becomes thick and creamy. This process may take 2-3 hours.
- Blender Method:
- Pour the ice cream mixture into an ice cube tray and freeze until solid.
- Once frozen, transfer the ice cubes into a blender or food processor.
- Pulse or blend the ice cubes until they reach a smooth and creamy consistency, similar to soft-serve ice cream.
These methods may require a bit more effort and time compared to using an ice cream maker, but they can still yield delicious homemade ice cream. Remember to freeze any leftovers in an airtight container for later enjoyment.
How should I store leftover KitchenAid Strawberry Ice Cream?
To store leftover KitchenAid Strawberry Ice Cream and maintain its texture and flavor, follow these steps:
- Cool Down: Let the ice cream cool down slightly after churning. This helps prevent ice crystals from forming when you freeze it.
- Transfer to an Airtight Container: Scoop the ice cream into a clean, airtight container. Ensure the container has enough space at the top to accommodate expansion during freezing.
- Cover Properly: Press a piece of parchment paper or plastic wrap directly onto the surface of the ice cream before sealing the container. This helps prevent freezer burn and ice crystals from forming.
- Seal and Label: Seal the container tightly and label it with the date so you can keep track of freshness.
- Freeze Immediately: Place the sealed container in the coldest part of your freezer, ideally at a temperature of 0°F (-18°C) or below.
- Avoid Frequent Thawing and Refreezing: Try to avoid repeated thawing and refreezing, as this can degrade the quality of the ice cream.
- Use within 1-2 Weeks: For the best taste and texture, consume the leftover KitchenAid Strawberry Ice Cream within 1-2 weeks of freezing. Over time, ice cream can develop ice crystals and lose its creamy texture and fresh flavor.
- Thawing Before Serving: When you’re ready to enjoy the ice cream again, transfer it from the freezer to the refrigerator for about 15-30 minutes to soften slightly before scooping and serving.
By following these storage tips, you can preserve the quality of your homemade KitchenAid Strawberry Ice Cream and enjoy it over several servings.
