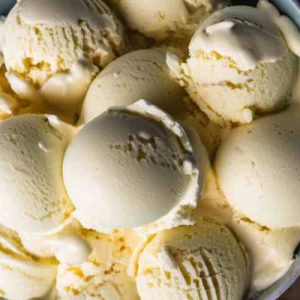
No/Without Egg Vanilla Bean Ice Cream offers a delectable alternative to traditional ice cream recipes, making it particularly appealing to individuals with egg allergies or dietary preferences. For those who cannot consume eggs due to allergies or choose to follow a vegan diet, no-egg ice cream provides a creamy and satisfying frozen dessert option without compromising on flavor or texture. By omitting eggs from the recipe, no-egg ice cream becomes accessible to a wider range of people with various dietary restrictions or preferences.
Now, let’s delve into the introduction of a delightful recipe for vanilla bean ice cream without eggs. This classic dessert, free from eggs but rich in flavor, captures the essence of smooth and velvety ice cream with the distinct aroma of vanilla beans. Perfect for those seeking a dairy-rich treat without eggs, this recipe promises a luscious and indulgent experience that can be enjoyed by everyone, regardless of dietary restrictions. Let’s explore how to create this egg-free version of vanilla bean ice cream for a delightful frozen dessert!

No/Without Egg Vanilla Bean Ice Cream Recipe
Ingredients
- 2 cups heavy cream
- 1 cup whole milk
- 3/4 cup granulated sugar
- 1 tablespoon pure vanilla extract
- Pinch of salt
Instructions
- Prepare the Vanilla Bean:Using a sharp knife, carefully split the vanilla bean pod lengthwise to expose the seeds inside.Scrape the seeds from the pod using the back of the knife. Set aside the scraped seeds.
- Make the Ice Cream Base: In a saucepan, combine the heavy cream, whole milk, granulated sugar, scraped vanilla bean seeds, and the split vanilla bean pod.Heat the mixture over medium heat, stirring occasionally, until it reaches a gentle simmer. Do not boil.
- Infuse the Flavor:Once the mixture is simmering, remove the saucepan from heat and cover it with a lid.Let the mixture steep for about 30 minutes to allow the vanilla bean flavor to infuse into the cream.
- Strain the Mixture:After steeping, remove the vanilla bean pod from the mixture.Use a fine-mesh sieve to strain the ice cream base into a clean bowl, discarding any solids.
- Chill the Mixture:Cover the bowl with plastic wrap or a lid, ensuring it touches the surface of the mixture to prevent a skin from forming.Chill the ice cream base in the refrigerator for at least 4 hours or overnight until thoroughly chilled.
- Churn the Ice Cream:Once chilled, pour the vanilla bean ice cream base into your ice cream maker.Churn the mixture according to the manufacturer’s instructions until it reaches a soft-serve consistency.
- Freeze the Ice Cream:Transfer the churned ice cream into a freezer-safe container.Cover the container with a lid or plastic wrap and freeze the ice cream for an additional 4-6 hours or until firm.
- Serve and Enjoy:When ready to serve, let the eggless vanilla bean ice cream sit at room temperature for a few minutes to soften slightly.Scoop the velvety-smooth ice cream into bowls or cones.Garnish with fresh berries, chocolate shavings, or a drizzle of caramel if desired.Delight in the luxurious flavor and texture of homemade eggless vanilla bean ice cream!
Notes
How Do You Make Homemade Ice Cream Without Eggs?
Making homemade ice cream without eggs is a simple and enjoyable process. Here’s a basic method to create egg-free ice cream:
Ingredients:
- 2 cups heavy cream
- 1 cup whole milk
- 3/4 cup granulated sugar
- 2 teaspoons vanilla extract (or seeds from 1-2 vanilla beans)
- Pinch of salt
Preparation Time: 10 minutes
Cook Time: 10 minutes
Total Time: 6 hours (includes chilling and freezing time)
It has 290.94 calories per serving
Instructions:
- Prepare the Ice Cream Base:
- In a mixing bowl, combine the heavy cream, whole milk, granulated sugar, vanilla extract (or vanilla bean seeds), and a pinch of salt.
- Whisk or use an electric mixer to blend the ingredients until the sugar is fully dissolved and the mixture is smooth.
- Chill the Mixture:
- Cover the bowl with plastic wrap or a lid and refrigerate the ice cream base for at least 2-3 hours, or until thoroughly chilled. Chilling the mixture helps enhance the texture of the ice cream.
- Churn the Ice Cream:
- Once the ice cream base is chilled, set up your ice cream maker according to the manufacturer’s instructions.
- Pour the chilled ice cream base into the ice cream maker’s bowl.
- Churn the mixture until it reaches a thick and creamy consistency, typically about 20-30 minutes.
- Freeze the Ice Cream:
- Transfer the churned ice cream into a freezer-safe container.
- Cover the container with a lid or plastic wrap to prevent ice crystals from forming.
- Freeze the ice cream for at least 4 hours or until it’s firm and scoopable.
- Serve and Enjoy:
- Once the ice cream is frozen, scoop it into bowls or cones.
- Garnish with your favorite toppings such as chocolate sauce, nuts, or fresh fruit.
- Serve immediately and enjoy your homemade egg-free ice cream!
This method produces a creamy and delicious ice cream without the use of eggs. Feel free to experiment with different flavors and add-ins to customize your homemade ice cream to your liking.
Ingredients In No/Without Egg Vanilla Bean Ice Cream
Here’s a detailed look at the ingredients commonly used in making no-egg vanilla bean ice cream:
- Dairy or Non-Dairy Base (Milk or Coconut Milk):
- The base of the ice cream provides the creamy texture and richness. Traditional recipes often use dairy milk, but for a vegan or lactose-free version, coconut milk or almond milk can be used as alternatives. Choose the type of base that suits your dietary preferences or needs.
- Vanilla Beans or Vanilla Extract:
- Vanilla is the star flavor in vanilla bean ice cream. You can either use fresh vanilla beans by splitting and scraping the seeds out or opt for vanilla extract for convenience. Vanilla adds a delightful aroma and a classic taste to the ice cream.
- Sweetener (Sugar, Honey, Maple Syrup):
- Sweeteners are essential to balance the flavors and add sweetness to the ice cream. Common options include granulated sugar, honey for a natural sweetener, or maple syrup for a distinct flavor. Adjust the amount of sweetener based on your preference for sweetness.
- Thickening Agent (Cornstarch or Arrowroot Powder):
- A thickening agent is necessary to give the ice cream a smooth and creamy texture. Cornstarch or arrowroot powder are commonly used options. These ingredients help bind the mixture together and prevent ice crystals from forming, resulting in a velvety consistency.
- Optional Add-Ins (Chocolate Chips, Fruit, Nuts):
- Adding extra ingredients can enhance the flavor and texture of the vanilla bean ice cream. Common add-ins include:
- Chocolate chips or chunks for a chocolatey twist.
- Fresh or frozen fruit such as berries, peaches, or bananas for a fruity burst.
- Chopped nuts like almonds, walnuts, or pecans for added crunch and nutty flavor.
- Other creative additions like cookie crumbles, caramel swirls, or sprinkles for variety.
- Adding extra ingredients can enhance the flavor and texture of the vanilla bean ice cream. Common add-ins include:
These ingredients come together to create a delicious and customizable eggless vanilla bean ice cream that caters to different dietary preferences and tastes. Adjust the proportions and ingredients based on your desired flavor profile and enjoy a refreshing treat without the need for eggs.

Serving Suggestions
Here are some delightful serving suggestions for enjoying your no-egg vanilla bean ice cream:
- Scoop into Cones or Bowls:
- The classic way to serve vanilla bean ice cream is by scooping it into ice cream cones or bowls. Cones add a fun and crunchy element to each bite, while bowls allow for easy customization with toppings.
- Pair with Desserts like Brownies or Fruit Crisps:
- Elevate your vanilla bean ice cream by pairing it with complementary desserts. Serve a scoop alongside warm brownies for a rich and indulgent treat, or top a fruit crisp with a generous scoop of ice cream for a delicious contrast of textures and flavors.
- Drizzle with Sauces or Syrups:
- Enhance the flavor profile of your ice cream by drizzling it with sauces or syrups. Popular choices include chocolate sauce, caramel sauce, berry coulis, or even a splash of flavored liqueur for adult-friendly desserts.
- Garnish with Fresh Fruits or Chopped Nuts:
- Add a pop of freshness and texture to your ice cream by garnishing it with fresh fruits like strawberries, blueberries, or sliced bananas. Chopped nuts such as almonds, pecans, or pistachios can also provide a delightful crunch and nutty flavor.
- Create Ice Cream Sundaes:
- Build a decadent ice cream sundae by layering vanilla bean ice cream with various toppings. Include whipped cream, sprinkles, crushed cookies, and maraschino cherries for a fun and colorful dessert experience.
- Make Ice Cream Sandwiches:
- Sandwich a scoop of vanilla bean ice cream between two cookies or brownies to create irresistible ice cream sandwiches. Roll the edges in sprinkles, mini chocolate chips, or crushed nuts for added flair.
- Incorporate into Milkshakes or Floats:
- Blend vanilla bean ice cream with milk to create creamy milkshakes, adding flavors like chocolate, caramel, or fruit for variety. Alternatively, float a scoop of ice cream in a glass of soda or flavored sparkling water for a refreshing beverage treat.
- Serve with Warm Desserts:
- Pair vanilla bean ice cream with warm desserts like apple pie, peach cobbler, or bread pudding for a delightful contrast of temperatures and textures.
These serving suggestions allow you to enjoy your no-egg vanilla bean ice cream in creative and delicious ways, making it a versatile and crowd-pleasing dessert option for any occasion.
Tips and Variations
Creating a delectable batch of eggless vanilla bean ice cream is a rewarding experience, offering a blend of creamy goodness and aromatic vanilla flavor. To ensure your ice cream turns out perfectly and to cater to various preferences and dietary needs, here are some valuable tips, exciting recipe variations, and thoughtful substitutions to consider.
Tips for Achieving the Best Results:
- Proper Storage: Store your prepared ice cream in an airtight container in the freezer. Pressing a layer of plastic wrap directly onto the surface of the ice cream before sealing the container helps prevent ice crystals from forming.
- Serving Techniques: For optimal scooping, allow the ice cream to soften slightly at room temperature for a few minutes before serving. Dip the ice cream scoop in warm water between scoops for smooth and round servings.
- Texture Enhancement: For an ultra-smooth texture, strain the ice cream base before churning to remove any lumps or bits of vanilla bean.
- Flavor Infusion: For a stronger vanilla flavor, steep the vanilla beans in the warm milk or coconut milk for a longer duration before straining.
Variations of the Recipe:
- Sweetener Alternatives: Experiment with different sweeteners such as agave syrup, stevia, or monk fruit sweetener for a lower-calorie or sugar-free version of vanilla bean ice cream.
- Flavor Extracts: Besides vanilla, explore other flavor extracts like almond, peppermint, or caramel to create unique and delicious ice cream flavors.
- Nutty Additions: Incorporate chopped toasted nuts like almonds, walnuts, or pistachios into the ice cream base or use nut milks for a nuttier flavor profile.
- Chocolate Swirl: Swirl melted chocolate or chocolate fudge sauce into the churned ice cream during the last few minutes of churning for a decadent chocolate-vanilla fusion.
Substitutions for Dietary Restrictions:
- Vegan Options: Use coconut milk, almond milk, or cashew milk instead of dairy milk. Replace honey with maple syrup or agave syrup for a vegan-friendly sweetener.
- Gluten-Free Adaptations: Ensure all ingredients, including add-ins like cookies or brownies, are gluten-free. Use gluten-free thickeners like cornstarch or arrowroot powder.
- Lactose-Free Choices: Opt for lactose-free dairy milk or plant-based milks like oat milk or rice milk to accommodate lactose intolerance.
By incorporating these tips, exploring recipe variations, and making thoughtful substitutions, you can customize your eggless vanilla bean ice cream to suit your taste preferences, dietary needs, and creative cravings. Enjoy the delightful journey of making and savoring homemade ice cream!
FAQ
Is eggless vanilla bean ice cream different from traditional ice cream?
Yes, eggless vanilla bean ice cream is indeed different from traditional ice cream. The primary distinction lies in the absence of egg yolks in the recipe. Traditional ice cream recipes often use egg yolks as a key ingredient in the base to add richness, creaminess, and a smooth texture to the ice cream. The egg yolks also act as emulsifiers, helping to bind the ingredients together and prevent ice crystals from forming during the freezing process.
On the other hand, eggless vanilla bean ice cream omits the use of egg yolks entirely. This results in a lighter and less dense texture compared to traditional ice cream. Without the richness from the egg yolks, eggless vanilla bean ice cream tends to have a purer and more pronounced vanilla flavor, allowing the natural sweetness of the vanilla beans or extract to shine through.
Despite these differences, both traditional and eggless vanilla bean ice creams can be equally delicious and satisfying, catering to different taste preferences and dietary restrictions. Eggless versions are particularly popular among those with egg allergies or dietary preferences that exclude eggs.
How can I prevent ice crystals from forming in my eggless ice cream?
Preventing ice crystals from forming in eggless ice cream is crucial for achieving a smooth and creamy texture. Here are some tips to help you prevent ice crystals:
- Chill the Base Thoroughly: Before churning the ice cream, ensure that the base mixture is thoroughly chilled. This allows the ingredients to incorporate evenly during churning, reducing the likelihood of ice crystals forming.
- Use a High-Fat Base: Opt for a higher fat content in your base, such as full-fat coconut milk or cream. The higher fat content helps inhibit ice crystal formation and contributes to a creamier texture.
- Add a Stabilizer: Incorporate a stabilizing agent like xanthan gum or guar gum into your ice cream base. These ingredients help prevent ice crystals and improve the overall texture of the ice cream.
- Churn Correctly: Follow the manufacturer’s instructions for your ice cream maker. Over-churning or under-churning can result in ice crystals or a grainy texture. Churn the ice cream until it reaches a thick and creamy consistency.
- Minimize Air Exposure: After churning, transfer the ice cream to an airtight container promptly. Press a layer of plastic wrap directly onto the surface of the ice cream before sealing the container to minimize air exposure, which can contribute to ice crystal formation.
- Avoid Temperature Fluctuations: Keep the freezer temperature consistent to prevent melting and refreezing, which can lead to ice crystals. Store the ice cream in the coldest part of your freezer.
- Use Alcohol: Adding a small amount of alcohol, such as vodka or rum, to the ice cream base can help lower the freezing point and inhibit ice crystal formation. Be mindful not to add too much alcohol, as it can affect the flavor of the ice cream.
- Thaw and Serve Correctly: When serving the ice cream, allow it to soften slightly at room temperature for a few minutes before scooping. Use a warm ice cream scoop to create smooth and round scoops.
By following these tips, you can minimize ice crystal formation and achieve a velvety smooth texture in your eggless vanilla bean ice cream.
How long can I keep homemade eggless vanilla bean ice cream in the freezer?
Homemade eggless vanilla bean ice cream can typically be stored in the freezer for about 1 to 2 weeks. However, the exact shelf life can depend on various factors such as the ingredients used, the storage conditions, and the overall quality of the ice cream.
Here are some tips to help you maximize the freshness and longevity of your homemade eggless vanilla bean ice cream:
- Airtight Container: Store the ice cream in an airtight container to prevent air exposure, which can lead to freezer burn and affect the texture and flavor of the ice cream.
- Plastic Wrap: Before sealing the container, press a layer of plastic wrap directly onto the surface of the ice cream. This helps create a barrier that minimizes ice crystal formation and helps preserve the creaminess of the ice cream.
- Freezer Temperature: Keep your freezer set at a constant and appropriate temperature, ideally around 0°F (-18°C) or slightly below. Fluctuating temperatures can impact the quality of the ice cream.
- Avoid Over-Freezing: While it’s tempting to keep ice cream in the freezer for an extended period, prolonged freezing can lead to a loss of flavor and texture. Try to consume the ice cream within the recommended timeframe for the best taste and consistency.
- Labeling and Date: Consider labeling the container with the date you made the ice cream. This helps you keep track of how long it has been in the freezer and ensures you consume it within the recommended storage period.
- Quality Check: Before serving, visually inspect the ice cream for any signs of freezer burn, such as ice crystals or changes in texture. If the ice cream appears compromised, it’s best to discard it to maintain a pleasant eating experience.
By following these guidelines and practicing proper storage techniques, you can enjoy your homemade eggless vanilla bean ice cream at its best quality within the suggested timeframe.
